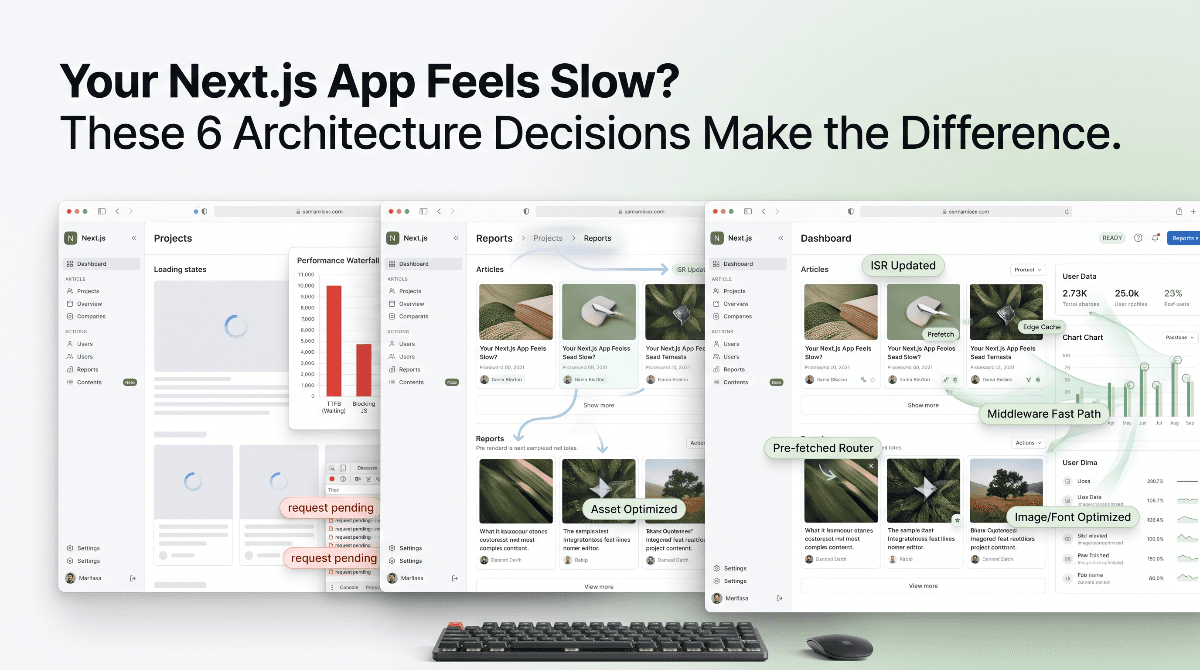
कोई website technically fast हो सकती है, लेकिन फिर भी user को slow महसूस हो सकती है।
वहीं दूसरी तरफ, कोई application background में अभी भी data process कर रही हो, लेकिन उसका interface user को ऐसा महसूस करा सकता है जैसे सब कुछ तुरंत हो रहा है।
इसी अंतर को Perceived Performance कहा जाता है — और modern web UX में यह actual loading speed जितना ही महत्वपूर्ण हो सकता है।
लक्ष्य यह है कि user को तुरंत पता चल जाए कि उसका action receive हो चुका है और application ने काम शुरू कर दिया है।
🧠 पहले इसे बिना Code के समझिए
मान लीजिए आप किसी restaurant में जाते हैं और खाना order करते हैं।
अब दो अलग-अलग experiences हो सकते हैं।
❌ Experience 1: कोई Feedback नहीं
आपने order दिया और waiter वहां से चला गया।
आपको नहीं पता कि order properly receive हुआ या नहीं, kitchen में काम शुरू हुआ या नहीं, या फिर कोई problem आ गई है।
भले ही आपका खाना सिर्फ पांच मिनट में आ जाए, लेकिन ये पांच मिनट काफी लंबे महसूस हो सकते हैं।
✅ Experience 2: तुरंत Feedback
आपने order दिया और waiter तुरंत कहता है:
"आपका order मिल गया है, kitchen में prepare हो रहा है।"
अब आपको पता है कि आपका request successfully register हो चुका है और काम चल रहा है।
Actual preparation time शायद बिल्कुल वही पांच मिनट है। लेकिन आपका experience काफी तेज महसूस होता है।
System जरूरी नहीं कि जल्दी finish हुआ हो — लेकिन उसने progress को जल्दी communicate कर दिया।
🌐 अब यही Concept Website पर लागू करें
बिल्कुल यही situation तब होती है जब कोई user website पर:
- Videos खोलता है
- Audio section पर जाता है
- Temples browse करता है
- Posts खोलता है
- Dashboard बदलता है
- Search करता है
अगर user click करने के बाद कुछ समय तक उसी screen को देखता रहे, तो उसके मन में पहला सवाल आता है:
"क्या मेरा click हुआ भी है?"
यही वह gap है जिसे एक अच्छी loading architecture को खत्म करना चाहिए।
बेहतर experience user को तुरंत यह signal देता है:
"हाँ, आपका action काम कर रहा है। अगला page load हो रहा है।"
⚡ Zero-Latency Perception का Core Architecture
Modern Next.js application में perceived performance को केवल एक loading animation के रूप में नहीं देखना चाहिए।
इसे कई layers के combination के रूप में design करना ज्यादा बेहतर approach है।
| Layer | काम | User को क्या महसूस होता है |
|---|---|---|
| Navigation Feedback | User के action को तुरंत acknowledge करना | "मेरा click काम कर गया।" |
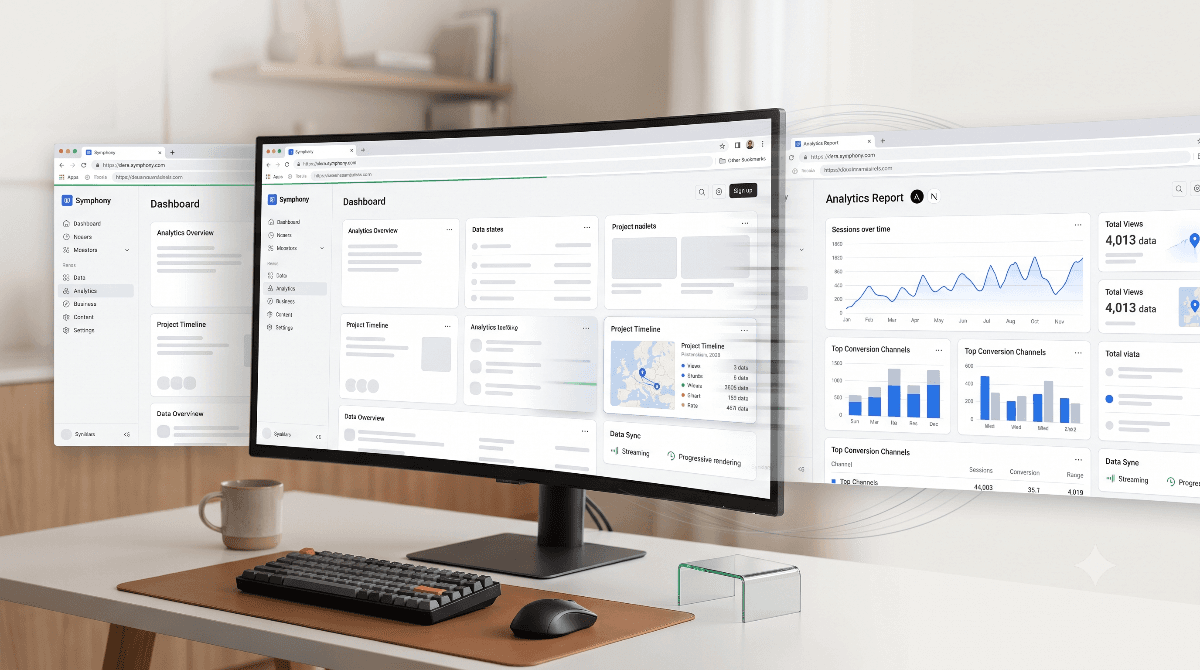
| Skeleton UI | आने वाले page की structure दिखाना | "Page अभी से दिखाई देने लगा है।" |
| CSS Motion | Transitions को smooth बनाना | "Interface respond कर रहा है।" |
| Streaming / Rendering | Content को progressively deliver करना | "Content लगातार आ रहा है।" |
🚀 Layer 1: Instant Navigation Feedback
सबसे पहली problem user के click और visible response के बीच का gap है।
उदाहरण के लिए user Videos पर click करता है।
User clicks "Videos"
        ↓
Navigation शुरू होती है
        ↓
Progress indicator तुरंत दिखाई देता है
        ↓
Next.js route load करता है
        ↓
Videos page तैयार होता है
        ↓
Progress indicator complete होता हैयहां Navigation Progress Bar server को faster नहीं बनाता।
लेकिन यह user की uncertainty को खत्म कर देता है।
🧩 Layer 2: Skeleton UI आखिर क्या है?
यहां Skeleton UI का मतलब किसी page का actual content दिखाना नहीं है। यह उस content की visual structure का lightweight placeholder होता है।
उदाहरण के लिए अगर Videos page पर तीन video cards आने वाले हैं, तो data आने से पहले खाली screen दिखाने की जगह कुछ ऐसा structure दिखाया जा सकता है:
┌──────────────────────────────┐
│ Videos                       │
│                              │
│ ┌──────────┐ ┌──────────┐    │
│ │          │ │          │    │
│ │ Skeleton │ │ Skeleton │    │
│ │          │ │          │    │
│ └──────────┘ └──────────┘    │
│                              │
└──────────────────────────────┘यानी Skeleton UI user को पहले से बता देता है कि content किस shape और structure में आने वाला है।
जब actual data आता है, तो skeleton की जगह real content दिखाई देता है। इससे transition blank screen से content आने की तुलना में काफी natural महसूस होता है।
Skeleton UI = आने वाले content का lightweight visual placeholder।
📁 Next.js में Route-Level Skeleton क्यों बेहतर है?
Next.js App Router में किसी route के लिए अलग loading.tsx file रखी जा सकती है।
app/
├── videos/
│   ├── page.tsx
│   └── loading.tsx
│
├── audio/
│   ├── page.tsx
│   └── loading.tsx
│
├── temples/
│   ├── page.tsx
│   └── loading.tsx
│
└── posts/
    ├── page.tsx
└── loading.tsxइसका सबसे बड़ा फायदा यह है कि हर route अपनी actual content structure के अनुसार loading experience define कर सकता है।
उदाहरण के लिए:
| Page | उपयुक्त Skeleton |
|---|---|
| Videos | Video-card placeholders |
| Audio | Audio-list / player placeholders |
| Temples | Image + information cards |
| Posts | Article title + text placeholders |
इस तरह loading experience generic नहीं रहता बल्कि page के actual design का हिस्सा बन जाता है।
🎨 Layer 3: Lightweight CSS Motion
जब page structure तुरंत दिखाई देने लगे, तो subtle animation interface को और responsive महसूस करा सकती है।
इसके लिए हर बार भारी animation library की जरूरत नहीं होती।
कई सामान्य UI transitions केवल CSS की मदद से handle किए जा सकते हैं:
transformopacitytranslate3d()- CSS transitions
- CSS keyframes
उदाहरण के लिए Skeleton shimmer effect एक lightweight CSS animation से बनाया जा सकता है।
@keyframes shimmer {
  0% {
    background-position: -200% 0;
  }

  100% {
    background-position: 200% 0;
  }
}यहां उद्देश्य animation दिखाना नहीं बल्कि loading state को visually alive रखना है।
♿ Reduced Motion को Ignore न करें
Animation UX को बेहतर बनानी चाहिए, accessibility problem नहीं बननी चाहिए।
जिन users ने अपने operating system में reduced motion preference enable की है, उनके लिए unnecessary movement को कम करना चाहिए।
@media (prefers-reduced-motion: reduce) {
  * {
    animation-duration: 0.01ms !important;
    animation-iteration-count: 1 !important;
    transition-duration: 0.01ms !important;
  }
}इस तरह application responsive भी रहती है और अलग-अलग user preferences का सम्मान भी करती है।
🌊 Layer 4: Streaming और Progressive Rendering
अब बात आती है actual content delivery की।
किसी page को हमेशा इस तरह सोचने की जरूरत नहीं है:
Request
   ↓
सब कुछ load होने का इंतजार
   ↓
पूरा page तैयार
   ↓
पूरा page दिखाओModern rendering approaches page के available हिस्सों को progressively deliver कर सकती हैं।
Request
   ↓
Page structure दिखाओ
   ↓
Available content stream करो
   ↓
बाकी sections render करो
   ↓
Page completeखासकर उन pages पर जहां multiple server-side data sources या अलग-अलग भारी sections हों, progressive rendering user experience को बेहतर बना सकती है।
📊 अब पूरी Architecture को एक साथ समझिए
मान लीजिए user किसी Next.js application में Videos section खोलता है।
एक अच्छी perceived-performance flow कुछ ऐसी हो सकती है:
1. User "Videos" पर click करता है
        ↓
2. Navigation feedback तुरंत दिखाई देता है
        ↓
3. Videos route loading शुरू करता है
        ↓
4. Video Skeleton UI दिखाई देता है
        ↓
5. Skeleton पर lightweight CSS motion चलता है
        ↓
6. Server-rendered content आने लगता है
        ↓
7. Real video cards skeleton को replace करते हैं
        ↓
8. Navigation feedback हट जाता हैध्यान दें कि यहां कोई एक feature पूरी performance experience को control नहीं कर रहा।
पूरी chain मिलकर application को fast feel कराती है।
🧠 यह Approach इतना Effective क्यों है?
User किसी application की speed को केवल stopwatch से measure नहीं करता।
वह यह भी देखता है कि interface उसे कितनी जल्दी information देता है:
- क्या मेरा action receive हुआ?
- क्या कुछ हो रहा है?
- मैं किस चीज का इंतजार कर रहा हूं?
- अगला content कैसा दिखाई देगा?
Blank screen इन सवालों का लगभग कोई जवाब नहीं देती।
Navigation feedback बताता है कि action शुरू हो गया है।
Skeleton UI बताता है कि आगे क्या आने वाला है।
Streaming और progressive rendering दिखाते हैं कि content लगातार आ रहा है।
Smooth transitions एक state को दूसरी state से naturally connect करते हैं।
💻 हर Loading State के लिए Heavy Animation की जरूरत नहीं
Loading transitions के लिए बहुत बड़ी animation dependency जोड़ना एक common mistake हो सकती है।
कई सामान्य loading effects CSS से ही आसानी से बनाए जा सकते हैं।
| Effect | Simple Approach |
|---|---|
| Fade In | CSS opacity |
| Slide / Move | CSS transform |
| Shimmer | CSS keyframes |
| Loading Indicator | CSS animation |
| Simple Transition | CSS transition |
इससे architecture lightweight और maintainable रह सकती है।
📱 यही Principle अलग-अलग Websites पर भी काम करता है
| Product | Instant Feedback | Useful Loading State |
|---|---|---|
| Video Platform | Navigation progress | Video-card skeletons |
| News Website | Route transition | Article skeleton |
| E-commerce | Cart feedback | Product-card skeletons |
| Dashboard | Action confirmation | Widget skeletons |
| Social App | Interaction feedback | Feed placeholders |
Product चाहे कोई भी हो, underlying UX principle वही रहता है:
Action Acknowledge करो → Progress दिखाओ → Structure दिखाओ → Content deliver करो
🛠️ एक Clean Next.js Performance Architecture
इन सभी concepts को मिलाकर modern Next.js application के लिए एक simple architecture कुछ ऐसी हो सकती है:
User Interaction
       ↓
Navigation Feedback
       ↓
Route-Level Loading UI
       ↓
Skeleton UI + Lightweight CSS Motion
       ↓
Server Rendering / Streaming
       ↓
Real Content
       ↓
Final Interactive Stateयहां हर layer की अपनी responsibility है।
यही separation architecture को समझना, test करना और maintain करना आसान बनाता है।
🧪 Performance को Verify करना भी जरूरी है
Perceived Performance का मतलब यह नहीं है कि actual performance को ignore कर दिया जाए।
Application को normal development और production validation के साथ test करना चाहिए।
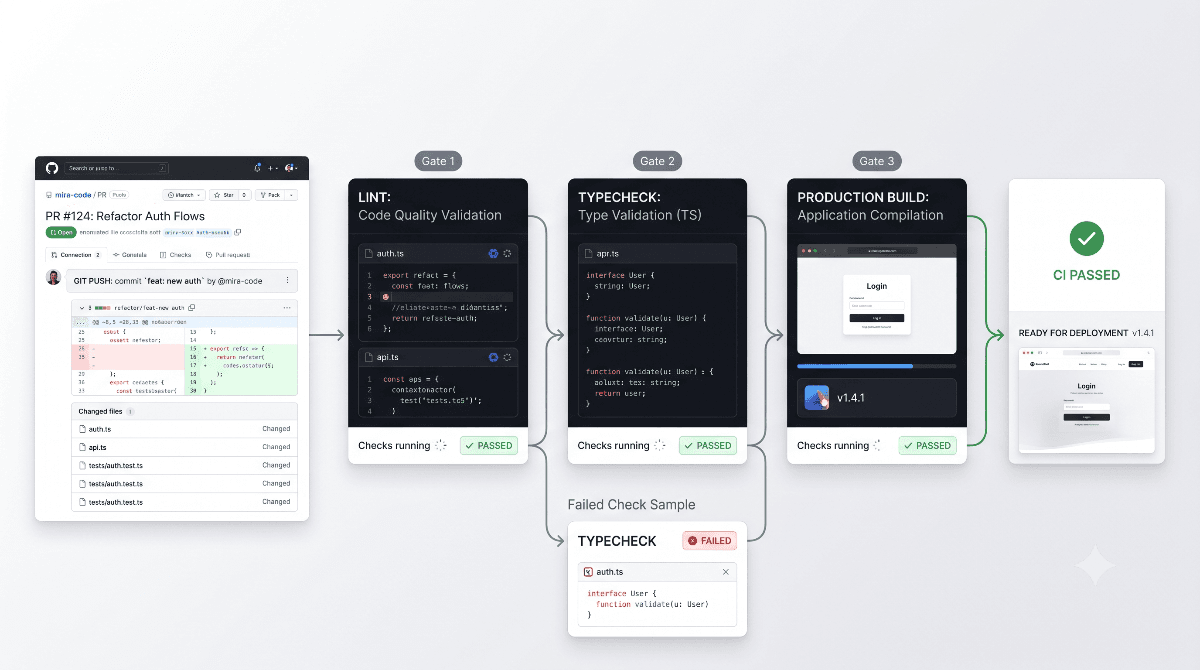
npm run typecheck
npm run lint
npm run buildइसके बाद important routes को manually test करें:
//videos/temples/audio/posts
खासकर slow network conditions में देखें कि user को click करने के बाद क्या दिखाई देता है।
⚠️ Perceived Performance को Real Performance न समझें
एक सुंदर Skeleton UI किसी fundamentally slow application को वास्तव में fast नहीं बना सकता।
अगर API को response देने में दस seconds लग रहे हैं, तो shimmer animation उस API को faster नहीं बना देगी।
इसलिए दोनों sides पर काम करना जरूरी है।
| Actual Performance | Perceived Performance |
|---|---|
| Server response optimize करें | Immediate feedback दें |
| Unnecessary JavaScript कम करें | Meaningful Skeleton UI दिखाएं |
| Database queries optimize करें | Progress visible रखें |
| Caching improve करें | Smooth transitions रखें |
| Assets optimize करें | Visual continuity बनाए रखें |
Real Performance application को वास्तव में faster बनाती है।
Perceived Performance उस speed को user के सामने visible बनाती है।
🎯 सबसे बड़ा UX Lesson
सबसे अच्छा loading experience वह नहीं है जिसमें सबसे ज्यादा animation हो।
सबसे अच्छा loading experience वह है जो user के basic सवालों का तुरंत जवाब देता है:
- क्या मेरा action काम कर गया?
- क्या system कुछ कर रहा है?
- मैं किस चीज का इंतजार कर रहा हूं?
- अगला content कैसा आएगा?
Navigation feedback पहले सवाल का जवाब देता है।
Skeleton UI दूसरे और तीसरे सवाल का जवाब देता है।
Progressive rendering चौथे सवाल का जवाब देता है।
इस तरह waiting period एक visible process बन जाता है, न कि सिर्फ एक blank screen।
🏁 Final Takeaway
Fast-feeling Next.js application बनाने का मतलब latency को flashy animations के पीछे छिपाना नहीं है।
इसका मतलब है user के action और final content के बीच आने वाले हर state को intentionally design करना।
एक strong architecture में शामिल हो सकते हैं:
- Instant Navigation Feedback
- Route-specific
loading.tsx - Meaningful Skeleton UI
- Lightweight CSS Motion
- Reduced Motion support
- Streaming और Progressive Rendering
- Actual Performance Optimization
सबसे अच्छी loading state वह है जो user को महसूस कराए कि application ने उसके action को तुरंत समझ लिया है और काम शुरू कर दिया है।